
Artistic Endeavours
Leather Jacket
& Satchel
Posted by Jeklyn Hyde on 2024-04-20
Read Time: 11 Minutes
My leather jacket needed some TLC and an old hoodie graphic needed a new home after the zipper failed.
Leather Jacket & Satchel
I bought a Joan Jett zip-up hoodie at a concert a long while back (in the late aughts to early 2010's), and the zipper finally gave out last month. I decided, rather than trying to repair the hoodie (I have too many anyway), that I would cut out the graphic and sew it onto my leather jacket.
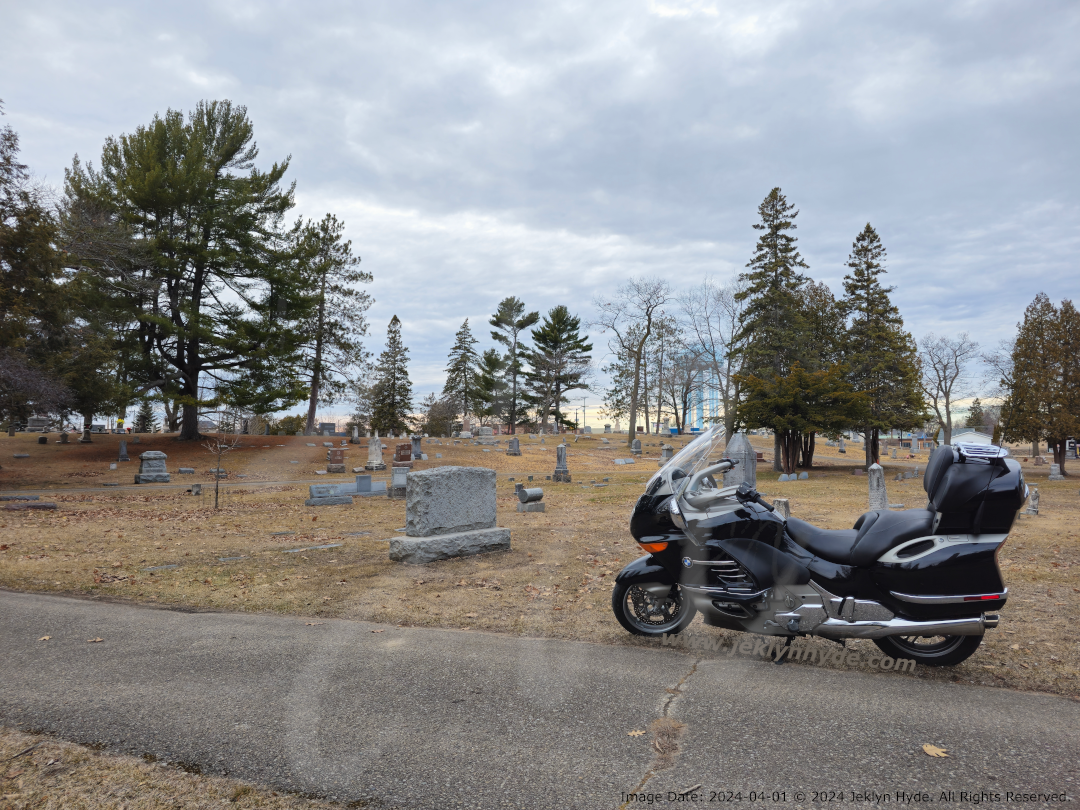
The jacket had sustained damage in a motorcycle accident in 2019 and I hadn't made the time to renovate it yet, so this was a good excuse to give it some TLC. My niece had gotten my old black leather satchel (I call it a leg bag) which needed repair and a re-dye as well, so I got that from her and worked on them together.

Image Date & Alt Text: 2024-03-03
Black fabric that has been cut to frame the rectangular extents of a white graphic showing Joan Jett with an electric guitar slung low on her back with the headstock pointing at an angle toward the ground. Joan is looking back over her shoulder. At the bottom, the text “Joan Jett and the Blackhearts” in all caps. This is resting on top of the back of a black leather jacket with chains around the arm holes.
I bought some leather cleaner, dye balm, and later some acrylic leather sealer.
When I bought this jacket it had some super long hanging chains. They run through eyelets at the sides and around the shoulders. There's a lot of extra chain to allow the sides to expand and contract and while fun, it would get in the way more often than not. So I contracted the jacket down just about as small as it gets and removed the extra chain.
Since I was intending to dye and condition the jacket, I wanted to make sure I got all surfaces, so I opened the chain back up and reattached the sections I had removed (I still knew where I was keeping them and found them quickly!). This allowed me to expand the sides again for easy access.
This also has zip-off arms, so I took those off so it would be easier to work with.

Image Date & Alt Text: 2024-03-13
A leather jacket spread out on the ground on a piece of cardboard. The arms have been taken off and are resting nearby. Chains weave in and out of eyelets that circle the arm holes. One of the chains has been reattached. The other is resting on the cardboard next to two pairs of pliers. There is a jar of dye balm and bottle of leather cleaner.
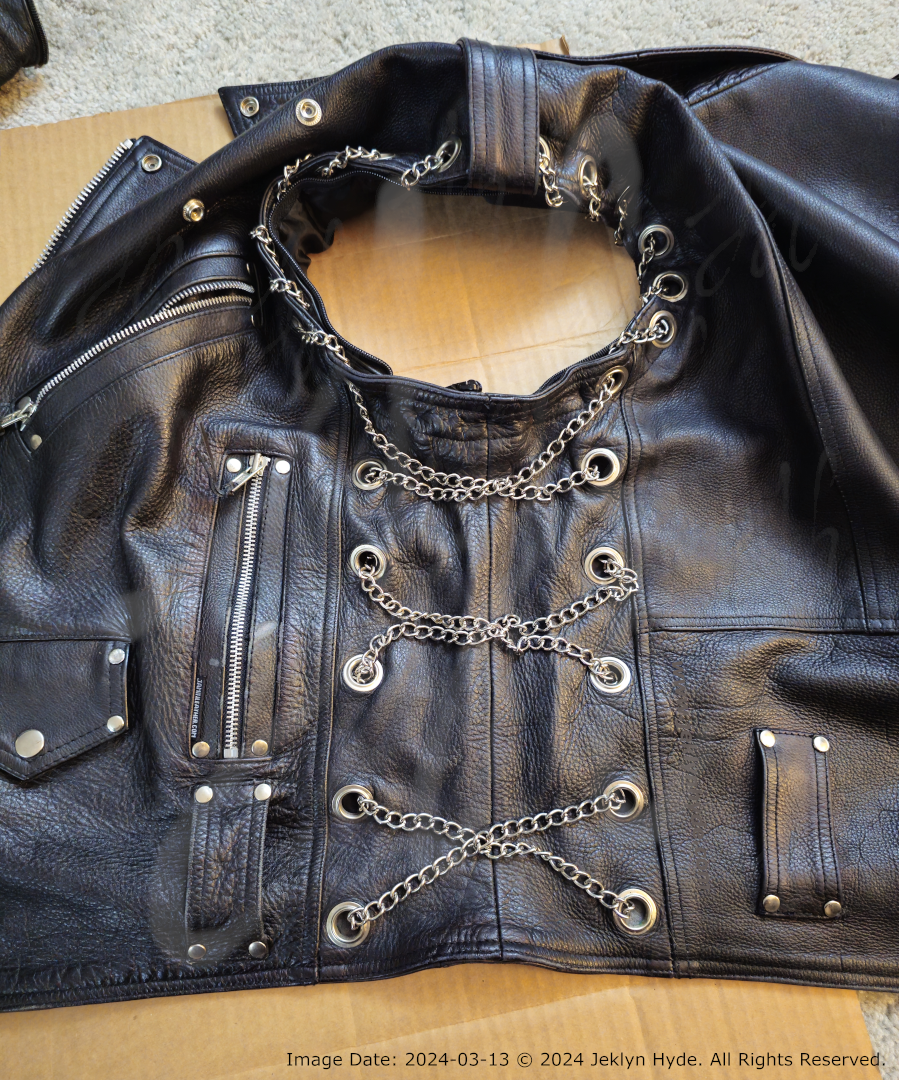
Image Date & Alt Text: 2024-03-13
A leather jacket spread out on a piece of cardboard. A chain weaves in and out of eyelets that circle an open arm hole with the arm removed. With the chain added back in, the side of the leather is expanded to its full width.
Both the jacket and the satchel had been "touched up" with some kind of leather dye by my mum, but it wasn't a good colour match and it was rubbing off on things, so I wanted to make sure I was starting from as clean of a surface as I could. I cleaned the jacket and satchel with "Furniture Clinic Leather Cleaner" which smelled vaguely like some kind of floor cleaner and let them sit overnight.
Then I gave them both a good coat with some black "Furniture Clinic Leather Recoloring Balm". I figure something that is made for leather furniture which sees a lot of use and abuse should be good for other things that are high use as well (like the jacket and satchel).
The process wasn't bad at all and didn't take as long as I expected. The results were pretty striking already, though I don't know how much of that can be attributed to the wetness of the dye balm. Just the one coat and then let them sit overnight.
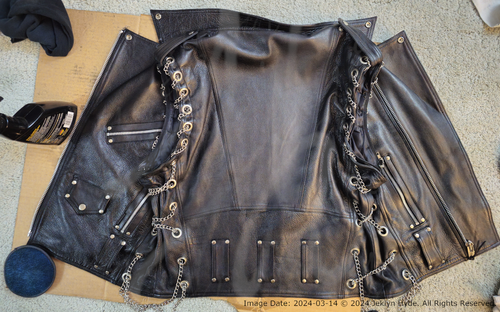
Image Date & Alt Text: 2024-03-14
A leather jacket spread out on the ground on a piece of cardboard. The arms have been taken off. The left side of the jacket, roughly down the middle of the back has been dye-balmed and is darker than the right half.
Image Date & Alt Text: 2024-03-14
A leather sleeve that has been detached from the rest of the jacket via zipper. The lower half has been treated with black leather dye balm contrasting with the untreated top half.
Then I -thought- that some vehicle-interior leather conditioner would be able to do the trick for conditioning and sealing the dye into the leather, but the stuff I got was a 3-in-1 thing (Cleaner, Conditioner, Protectant) that didn't work well for my intended purpose. I think it did more to remove the dye than anything, and even after a long drying time, dye still rubbed off when wiping the jacket. But it was at least a little more supple and good enough to work with for getting the hoodie graphic on.
I made some rough measurements and trimmed a little more so there is about 1/4" fabric border around the edges of the graphic and tried my best to center it on the jacket. Neither the jacket nor the graphic are perfectly symmetrical, so it was less measuring and more visually lining things up so that it looked good. I even used some tape to hold it in place so I could hang it on a mannequin and better see how it would look in the completed position.
Then I grabbed some E6000 glue and an old repurposed spatula and slathered a bunch all over the leather to temporarily attach the graphic, paying special attention to the corners and edges. I just needed it to stay in place long enough to be able to sew it.
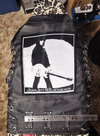
Image Date & Alt Text: 2024-03-15
A white-on-black Joan Jett graphic resting on top of the back of a black leather jacket. A ruler rests on the lower half of the jacket.
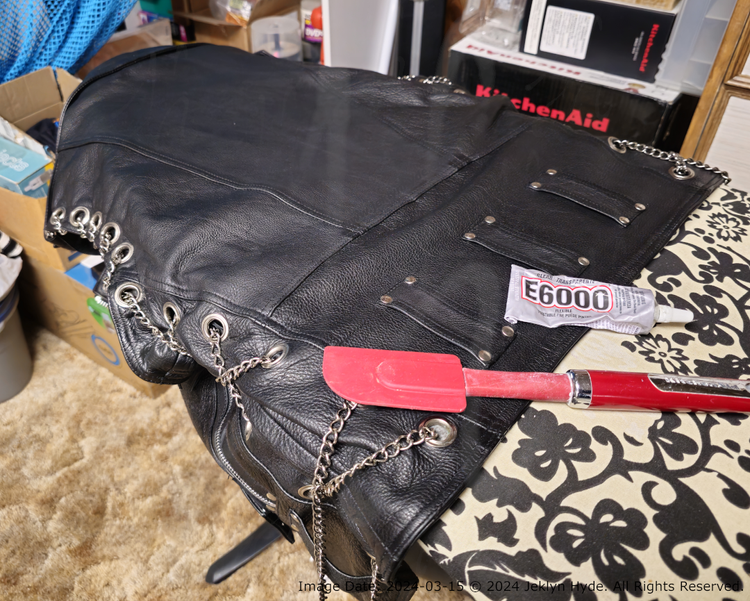
Image Date & Alt Text: 2024-03-15
A leather jacket hanging over the pointed end of an ironing board. A red spatula and a tube of E6000 glue rest on the jacket.
I let that sit overnight again and then took to the sewing machine. Well, first I had to hand-pick out the stitching in the liner. In order to get full access to the back side of the leather, I had to take out the stitching from both sides and all the way along the bottom. Dry testing it with the sewing machine foot, that gave me enough maneuverability to access all the corners and not be sewing over anything I shouldn't.
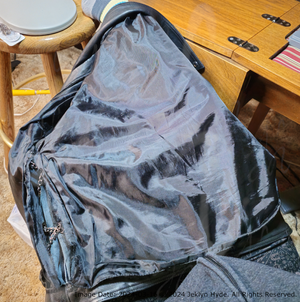
Image Date & Alt Text: 2024-03-16
The inside of a leather jacket showing a black satin liner. The stitching has been removed along the bottom and side. Some chains are visible where the liner is open.
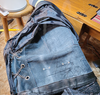
Image Date & Alt Text: 2024-03-16
The inside of a leather jacket where the stitching has been removed from the black satin liner which has been pulled up revealing the inner side of the leather which has several rivets for the belt loops on the other side. A chain runs through eyelets on the side.
Thankfully I have a heavy duty sewing machine which I've worked leather with before, but I bought some heavy duty needles too. I used 100% clear nylon thread. It was a little hard to work with because it was kind of like fishing line, but once I started stitching, it didn't give me any issues.
Settings on the machine: I kept a straight stitch with the length set to 4 (if I remember correctly) and tension set to 5, and for the edges, set the needle position to the far right and aimed for the edge of the foot to be about even with the edge of the fabric.
I did two passes. One along the edge of the fabric and one along the edge of the graphic. All the way around on all edges. The top corners at the shoulders were the most difficult part. There's a leather seam there and I had to position things very carefully to make sure I wasn't sewing over the lining underneath. Bunching up the leather to make it pass around the right side of the foot in the crook of the arm of the machine was also a challenge, but with care, was manageable. For the sections with overlapping leather seams, I had to help the needle along by manually turning the hand wheel on the side to help push it through all that leather.
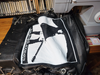


Image Dates & Alt Text: 2024-03-16
A black leather jacket with a Joan Jett graphic that is in the process of being sewn on with a heavy duty Singer sewing machine. The first picture shows before sewing has started with the foot down, positioned at the top-left corner. In the second picture, the first line has been made along the top edge of the fabric and the foot is back at the starting position in the top-left corner. In the third picture, the foot is down, positioned in the opposite corner, the jacket has been rotated 90 degrees, and is ready to start on the right outer edge. The other parts of the jacket are bunched up tightly in the crook of the sewing machine’s arm.
The whole process took me about 3 hours, including some fussing to load up a bobbin with the clear thread. But then I had to sew the lining back in. By hand. That alone took me at least 3 hours and made heavy use of a thimble (enough that my finger would get a little pruney). I bent two needles and stuck myself several times in the process.
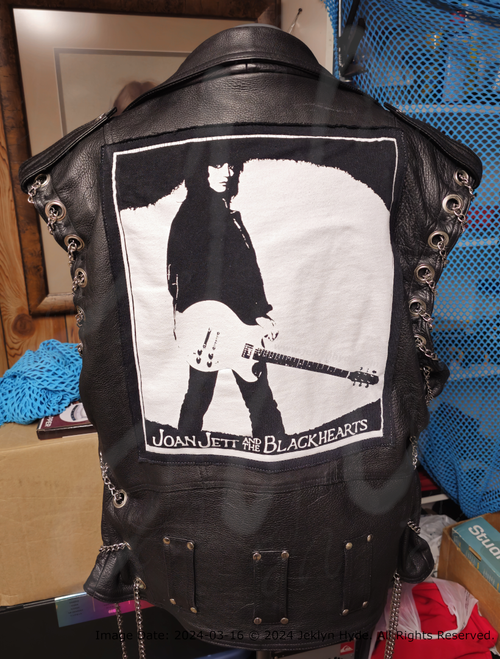
Image Date & Alt Text: 2024-03-16
A white-on-black Joan Jett graphic that has been sewn to the back of a black leather jacket.
Though I started wearing the jacket after that, it wasn't quite finished. The dye was still kind of rubbing off, and some had come off in a chunk when I had taped the graphic in place to test positioning. I did some online searching and found more information about leather sealers and decided on some "Fiebing's Resolene Finish – Neutral ... Protective top Finish for Leather". This is an acrylic liquid that can be sprayed or wiped on with a sponge, doesn't alter the colour of the leather, results in a shiny to glossy finish, and provides some water resistance. Exactly what I needed.
I did another pass with the dye balm for both the jacket and the satchel, let them sit overnight, and then did a pass with the Resolene. The satchel only needed the one pass. I didn't get any dye to come off when I buffed it the next day. And the thing looks practically new again. Lucious.
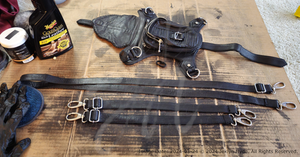
Image Date & Alt Text: 2024-03-24
A black leather satchel with matching straps and silver-coloured metal attachment points and hardware, that are all resting splayed out on a piece of carboard that has a lot of dried black dye on it.
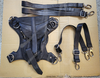
Image Date & Alt Text: 2024-04-14
A black leather satchel with matching straps and silver-coloured metal attachment points and hardware, resting apart from each other on a piece of clean carboard. The leather is looking a little dull after a 3-in-1 cleaner / conditioner / protectant was used on it.
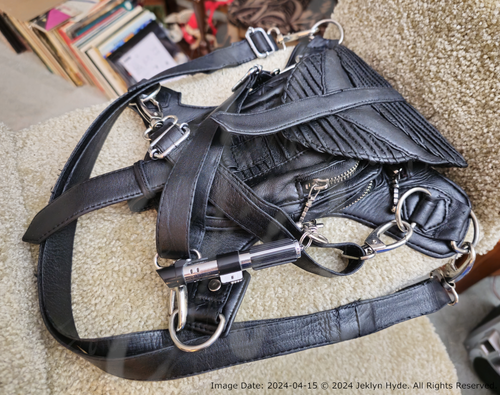
Image Date & Alt Text: 2024-04-15
A black leather satchel with matching straps and silver-coloured metal attachment points and hardware, resting on the top of a carpeted cat tree. The satchel has been re-dyed and an acrylic sealant applied and is looking vibrant and shiny. A Darth Vader light saber keychain (a defunct laser pointer) has been attached to one of the zippers.
Not so much for the jacket. Dye was still rubbing off when buffing, so it got another Resloene coat and another rest overnight. When tested again the next day, dye wasn't rubbing off anymore. The jacket is a little squeakier now, but that's probably more of how it used to sound when it was new.
All-in-all, the process wasn't too bad and the results are spectacular even though the jacket wasn't in bad condition to begin with. And now I've got an even more badass jacket that no one else in the world has.
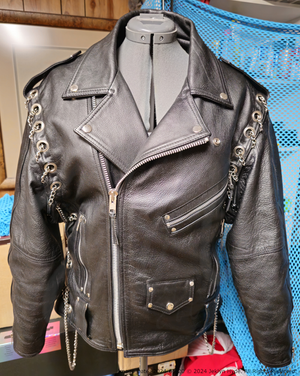
Image Date & Alt Text: 2024-04-20
The front of a black leather jacket that has the arms attached again resting on a mannequin, with the zipper done up partway. The leather dye has been recently refreshed, and with a second coat of acrylic sealant, it is looking vibrant and shiny.

Image Date & Alt Text: 2024-04-20
The back of a black leather jacket that has the arms attached again resting on a mannequin. A Joan Jett graphic is sewn on. The leather dye has been recently refreshed, and with a second coat of acrylic sealant, it is looking vibrant and shiny.